Showing posts with label beach week. Show all posts

10.8.14

Riva La Diva

Hey all!

It's been a LONG while since I started blogging up in here.
Recently, I started a new blog at Riva La Diva.com.

Basically the same sort of diy stuff I have typically done in the past over here like sewing, fashion, etsy stuff, building, baking and what not...


Check it out, tell me how you love it at Riva La Diva.com!

I am still posting here from time, with a new idea I have so stay tuned! :)

Until then, hope you all are having a very good time enjoying the last of your summer!

Riva
XO

2.6.11

I LOVE the Beach!

I LOVE the beach.  Checkout this fun painting tutorial to I am showing off. It was inspired from a painting I saw a few days ago in my latest Ballard Designs catalog.

Materials:
  • Blank canvas,
  • acrylic paint (I used Ultra Blue Deep and Bleached sand from Americana),
  • paint brushes,
  • sponge brush,
  • a "beach" stencil (I made my own).
Prepare the work station.

Liberally, apply your sand color paint. Spread the paint on the canvas in a left to right (horizontal motion).
Paint about half way up the board,
Apply your ocean blue color and spread,
more blue,
Blend it in so that the color appears to go from dark blue to light blue (overlapping the white a bit),
Add more color and blend, again,
I wanted more blue to show on the canvas for my beach stencil, so I added more paint at the halfway point. This made it so that the blue took 2/3 thirds of the board.
Blend, add more white, blend, add more blue, BLEND, blend and blend until it's just right, and maybe blend a little more without overworking it. I wasn't sure how this was turning out until my 5 year old pointed out that I was painting the beach (I figured if she could get what it was then it wasn't as bad as I thought).
Make your beach stencil. I typed the word "beach" on word and printed it out. I used an xacto knife to cut the letters out.
LIGHTLY dab paint over the stencil - trying to not let the paint seep under your stencil. Printing your stencil on cardstock might make for an easy application if you are unsure about stenciling over you painting.

and TA DA!


I am not a professional artist but I LOVED doing this and it turned out so nicely!
This TOTALLY brings the beach closer to my home and I love the fresh look it adds to my living room.

Thanks for visiting!

1.6.11

Beach Loving...

Here is a quick and EASY decor idea to quickly update your home for summer - it took less than 30 minutes to do and could be made easily under $5.

I saw these cute framed shells here,
and thought I could easily make my own, so here's what I did...

Materials:
  • hot glue and gun,
  • frame,
  • decorative card stock,
  • shells (thank you dollar store).

Cut card stock to fit the frame and put in before the glass (Glass will hide behind the cardstock).
Lay out your shells to their desired location on the cardstock.
Apply glue to the shells and adhere them to the cardstock. Move fast so the glue doesn't dry when you put the shells on but with precision so that your shells won't look sloppy - I bought extra cardstock in case I made a mistake.

Et Voila! You are done - Easy Right?

31.5.11

Message in a Bottle

Hello again!
For those who are visiting for the first time, I am in the mood to celebrate my home for summer! I love the beach. The sun, shells, water, cool breezes, and the sand. Especially the sand. There's something very neat that happens when you stick your feet in warm salty, beach sand. So my inspiration for today's crafts were inspired by the sandy beaches...
First: I have my Sandy Birds. Birds are in, and you'll find them on many blogs, store catalogs, and magazines.

Materials:
  • Beach Sand,
  • Fake birds (scored mine at the Dollar store),
  • Tacky glue,
  • Spray paint (I used gold for my base),
  • Paint brush,
  • Glue on rhinestones (to make it ,
  • Clear/Sealer Spray Paint (make my birds shine).

1. Spray a base coat on the birds. I used gold because it's one of my favorite colors but I am sure that any other neutral color would work fine. Let it dry. You might have to put a second coat - I did.

2. Liberally apply tacky glue to the bird with a paint brush.


3. Pour your beach sand over the bird on the glue.

4. Let the glue dry. Spray a clear coat of sealer on the birds and let them dry.

5. Once dry, attach your glue-on rhinestones to the eyes of the bird. For those who aren't excited about the rhinestones, they still look really cute without.
Second project: Beach in a Bottle.

This project was inspired a few years back. While vacationing, my husband and I visited a small island off the coast of Puerto Rico, named Culebra. We got to spend a day, ALL DAY, on Flamenco Beach (among other beaches) and this was the best. It was a place and time in my marriage I never wanted to forget. So, I took some Flamenco Beach sand and shoved in an old water battle. Years have passed since then and we just moved to California. I still have that bottled of sand (shoved in a drawer box somewhere). I don't want to throw it out but I cannot display as is. I thought it would be so cool to travel more (one day) and visit and collect more sand from other beaches around the world!
Well, we now have a few kids, so currently, we are collecting sand form the beautiful beaches of Cali.

Here's what you'll need:
  • Sand,
  • Bottle (I used a small pellegrino bottle),
  • cork or foam sheets,
  • tacky glue,
  • twine or rope,
  • tags or paper,
  • funnel.

1. Wash bottles and remove labels. Scrubbing your glass bottles with rubbing alcohol will get the stubborn glue to come off if soaking will not work.

2. Using a funnel, pour your sand in the bottle.

3. Now, I could not find corks anywhere and I didn't want my monkeys to pour the sand out so I decided to use folded up pieces of foam to close the bottles. Once I managed to shoved a HUGE piece of foam in the opening, I put a little bit of tack glue on the inside so it would stay put.

4. I also put glue on the top to seal the bottle shut.
5. Print out the name of the beach you visited or some fake beach you hope to visit on paper and tie it to your bottle. I think I will search for cute, old fashioned tags for these. Now to search for my PR sand...

30.5.11

Chic BEACH/BATH TOWEL

So, I am also adding adding a beach/bath towel to this week. I meant for beach week to have a decor theme to it - my home is in dire need of a quick update. But, I just finished this towel for a birthday gift and had to share...

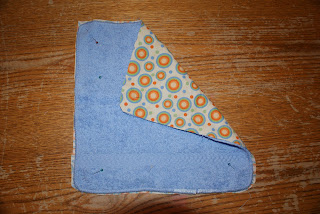
I USED: 2 wash towels, 1 large bath towel, and 1/2 yard of fabric.
WHAT I DID: Cover wash towels with fabric. Sew together to make the hoodie. Attach hoodie to the towel, attach trim (fabric) to the edges, and attach the first intial (using leftover fabric) to the outside of the towel.

 Do I need a more extensive tutorial for this? I was inspired by the pottery barn for kids site and their towels found here and here


Thanks for visiting! :)

Beach Balls

Hello! So here's what I've got planned for today... Decorative Sea Shell Balls. They were easy and quick to get done. I have 3 monkeys to chase after and Mondays are so hectic. I thought this would be a great way to quickly update the home.

Decorative Ball:
  • Shells, I found mine on the beach and the dollar store,
  • Foam Decorative Balls,
  • Hot Glue and gun.


One fabulous step: Glue shells on the foam balls!


Notice the third ball; after gluing the shells to the foam balls, I still had a lot of leftover shells. So I threw them into a round glass vase from the dollar store. They are about the same size as the foam balls and I think it turned out all right.
Related Posts Plugin for WordPress, Blogger...