


I love BOWS and it's been a little obsession of mine for the last couple of years. I call it my "bow"session - dorky, right? Anyways, when done well, my eye is always drawn to it! So with this little fling of mine, I thought I would flaunt it a little more in my everyday wardrobe with this bow necklace.
Here's what ya need:
Polymer clay (I used the color "marble"), 1 head pin, 1 jump ring, decorative chain

Condition your clay. I used a pasta machine (specific for clay), but you can just use your hands. Work the clay and until it’s warm and is not crumbling. Then prepare your strips. I love this little gadget because it keeps my clay at a specific thickness but like I said, revert back to childhood and use a rolling pin or some sorts to make this strip for your bow. I wanted a REALLY large bow and used all my clay. Decide how large you want for your bow; the best part about this clay is that it's very forgiving and you can redo it many times until desired results are achieved!

Measure how long and wide you would like your ribbon for your bow.

I liked the width of my ruler shown below and used that as my guide. Afterwards, I moved it across the ribbon for added length. My ruler is about one inch wide and almost 18 inches in length,
BUT you can choose whatever length desired! Remember to experiment with the previous steps a few times over to achieve desired results. If you make a mistake, start over - oh, the joys of working with clay!

Fold over one side.

Fold over the other side. Notice the ends of the ribbon meet the ends of the bow loops.

Here's the excess clay from the trimming part; I will flatten that out and use it for the center part of my bow.

Pinch center of bow.
I tried to create a fold in the center of the clay so that it looks a little natural when it's finished

Prepare, measure, and trim the center of bow. NOTE: I did not make this part as wide as the strips I used for the bow, it's probably close to half the width.

Lay over center of the bow.

Flip it over and trim excess.


Fold the strip down and blend clay into the other end of the center strip. This takes a lot of time a patience.

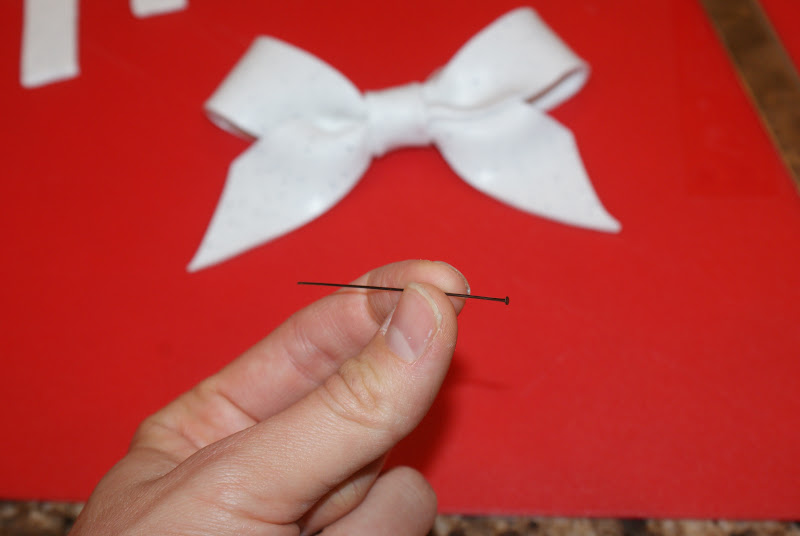
Take your head pin and insert into your bow center before baking the clay.
Bake according to clay directions. Hold the head pin with round nosed pliers and keeping a little space above the top of your bow. Wrap the wire around one side of the round nosed pliers to make a loop. Trim the long end of the wire off at the top of the bead with wire cutters.
Did I confuse anyone? Here's a tutorial online about how to do this: MAKING LOOPS.

I did attach a jump ring to my loop and then attached to my chain necklace. I wanted the bow move around when I moved. The jump ring would help the bow glide and adjust along the chain as needed.
So there you have it! It's a little large, but I LOVE it.
So neat it would be to have many in different sizes and colors!
Anyways, I am excited to wear it all about!! :)


BTW, the fabric shown in the very first picture of this post is part of my purse-piration project!
I am excited to show off this little goodie when I am done!! Stay tuned for that! :)
1 comment:
What a clever idea! I'm so glad to be following you, love your blog:)
Katie
www.funhomethings.com
Post a Comment